
Client Billing: The Basics and How to Make It Work for You
.webp)
If you’re sending out invoices manually, switching between apps to track payments, or reminding clients every month that they still owe you, it’s time for something better. Client billing is more than just paperwork. It’s how you stay on top of your money and keep projects running without hiccups, which ensures your work actually pays off.
That’s what this post is about. No jargon. No fluff. Just clear steps and methods that help you build a billing setup that works well, whether you're a freelancer juggling gigs or an agency working with retainers.
Key Takeaways
- Know about client billing and different ways to bill a client to choose the method that maximizes your cash flow and client satisfaction.
- Explore the simple steps to set up client billing in Cloudways to save hours of administrative work each month.
- Identify the common billing mistakes to avoid so you can get paid faster and maintain better client relationships.
What Client Billing Really Means
Client billing is getting paid for your work. You create an invoice, send it, and receive payment. Simple as that. Also, good billing does more than collect money. It represents your business. When clients see clean, consistent invoices, they see a professional operation. No more hunting down late payments or digging through emails to find what you agreed on last month.
Tools like Cloudways Client Billing put everything in one spot. Your services, invoices, payment records, and client details all live together. This means less work for you and no need to patch together different systems or start from zero.
Why Billing Gets Overlooked, But Shouldn’t Be
A lot of people treat invoicing like an afterthought. That’s usually when problems start. Here’s what a reliable billing process gives you:
- Better control over income: You know when money’s coming in. That makes it easier to plan.
- Less stress with clients: Clear invoices mean fewer questions and faster payments.
- Time saved: If you’re not manually writing every invoice, you’ve already won back hours.
- Fewer errors: A reliable system prevents missed payments, double invoicing, and unpleasant follow-ups.
Different Ways to Bill a Client
There’s no single way to do this. What works best usually depends on your service, client, and how long the work runs. Here are a few of the most common setups:
1. Hourly: This one is simple, where you log the hours and send the invoice based on that.
- Good for: short projects, consulting, or work that shifts as it goes.
- Heads-up: clients will probably want to see what those hours went toward.
2. Flat Fee: You set a price upfront, and the client pays that price no matter how many hours it takes.
- Good for: Defined scopes like logo design, landing pages, one-time audits, or similar.
- Heads-up: Don’t skip the scope details. If things grow and you didn’t account for that, you’ll end up doing extra work with no extra pay.
3. Retainer: Your client pays the same amount every month, usually for ongoing work. You agree on what’s included like content updates, monthly strategy calls, or support.
- Good for: Steady clients and long-term partnerships.
- Heads-up: Be clear about what’s covered. If they ask for extras outside the retainer, you’ll need to price that out separately.
Tools like Cloudways make this kind of billing easier. You can set recurring services, automate invoices, and keep everything tied to the same client profile.
4. Milestone-Based: This one splits bigger projects into stages. You get paid as each part is delivered. No need to wait until the end.
- Good for: Redesigns, multi-phase builds, massive projects, or anything with checkpoints.
- Heads-up: Make sure milestones are written out and agreed to early. Payment timelines should be tied to those steps, not vague goals.
5. Recurring: You charge the client the same amount each billing cycle. It might be monthly, quarterly, or something else. This is different from retainers because it's often tied to products or support, not services you log hours for.
- Good for: Hosting, licenses, or subscriptions.
- Heads-up: Make sure the tool you’re using handles auto-billing, different currencies, and payment tracking.
How to Set Up Client Billing on Cloudways (Steps)
There’s no need to overthink this part. Start with the tool you already use or one that doesn’t get in your way. If you’re working with Cloudways, the billing features are already baked into the platform. No juggling between apps. No setup that takes all afternoon.
You’ll be able to send invoices, keep tabs on clients, and plug in payment details (all in one space). Stripe works right out of the box if you want to accept debit or credit cards.
Step 1: Choose Your Tool
First, pick the tool you want to use for managing billing. You can explore options like FreshBooks, Zoho Invoice, or QuickBooks. But if you're already using Cloudways, their built-in Client Billing and Reporting tool is the most efficient option.
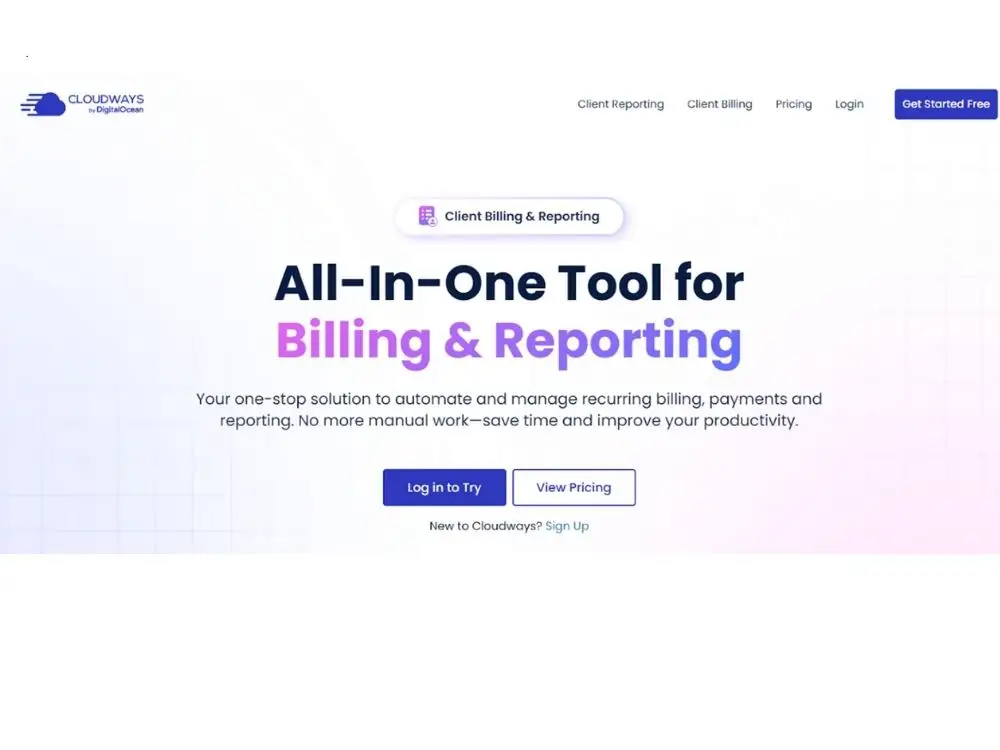
It brings invoicing, client data, payment tracking, and reporting into one dashboard, no switching tabs or logging into multiple platforms.
Once you’ve selected Cloudways Client Billing, getting started is easy.
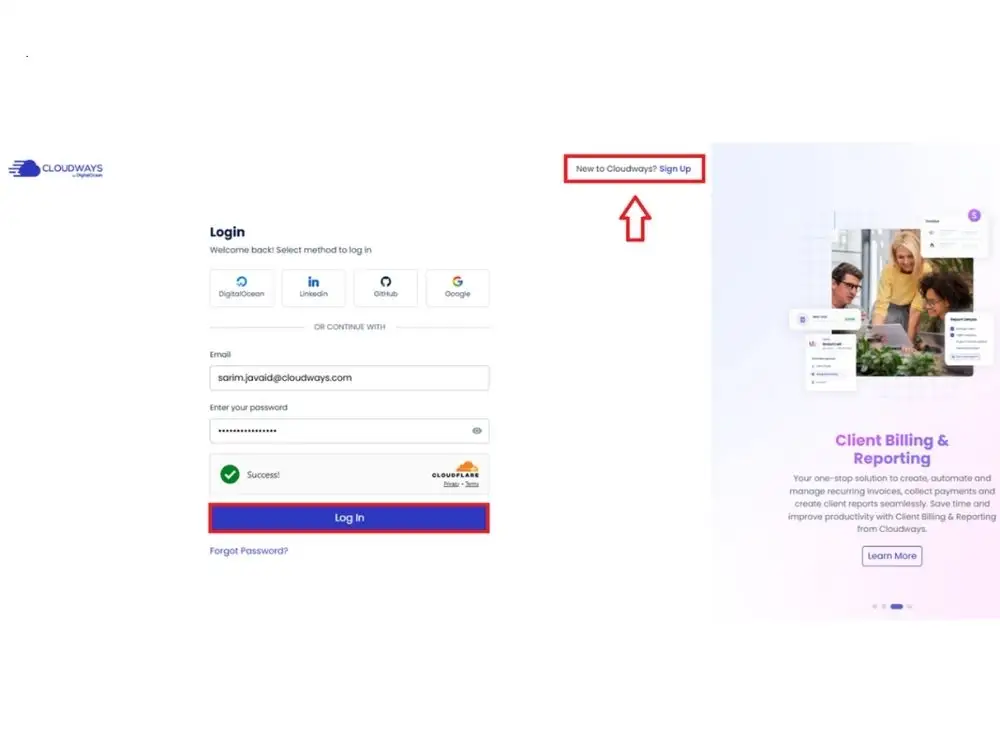
- Log in to the Cloudways Platform. Not a Cloudways user? Just sign up and get their 3-day free trial (no credit card needed)
Note: Please remember that in order to utilize Client Billing, you must have a freelancer, SMB, or agency personality.
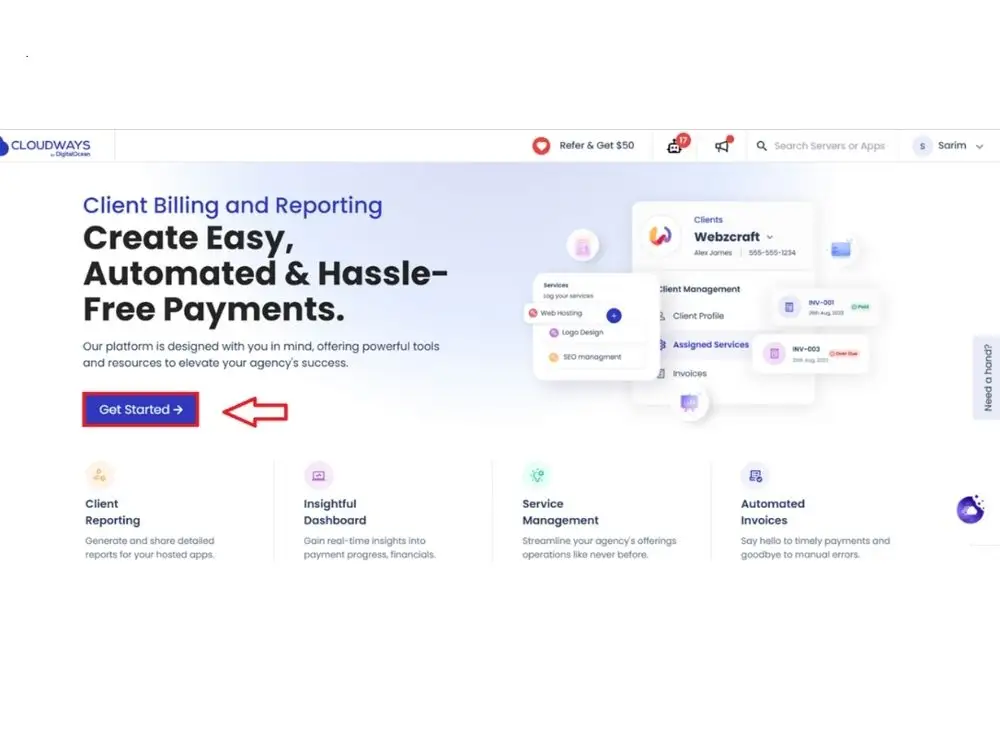
Step#2: Getting Your Billing Panel Ready
Once you’re inside the billing dashboard, the steps are pretty simple:
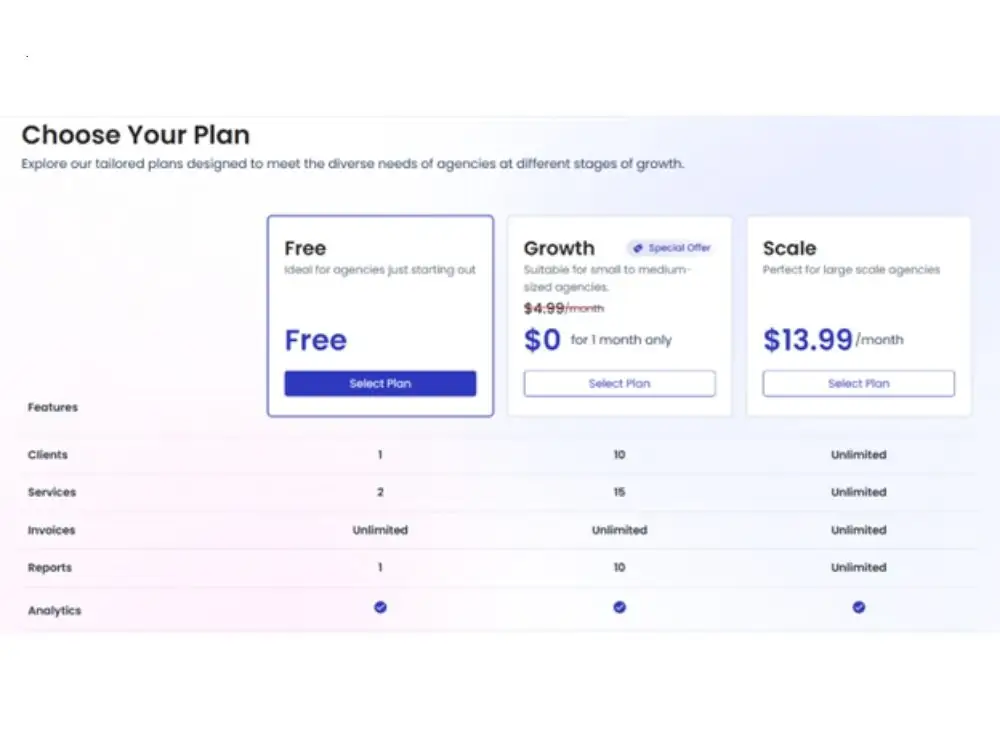
- Hit “Get Started.”
- Choose your plan.
- Set up your agency.
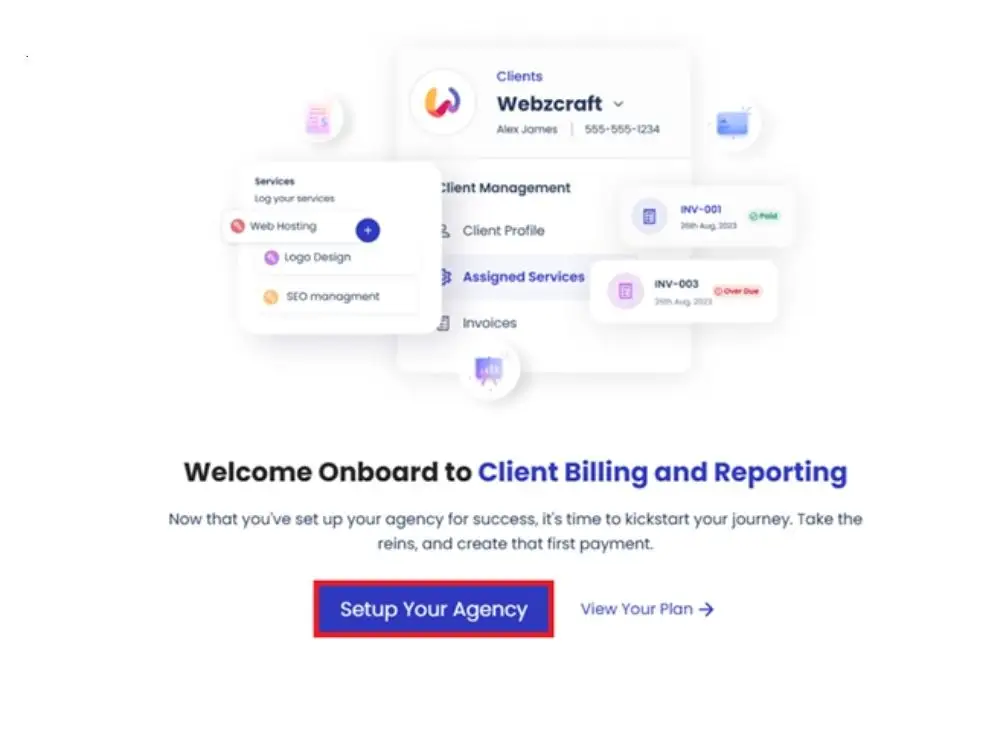
- Add your business name, upload a logo & pick your colors if branding matters to you.
- Integrate your Stripe account.

- Pick a billing cycle and due dates.
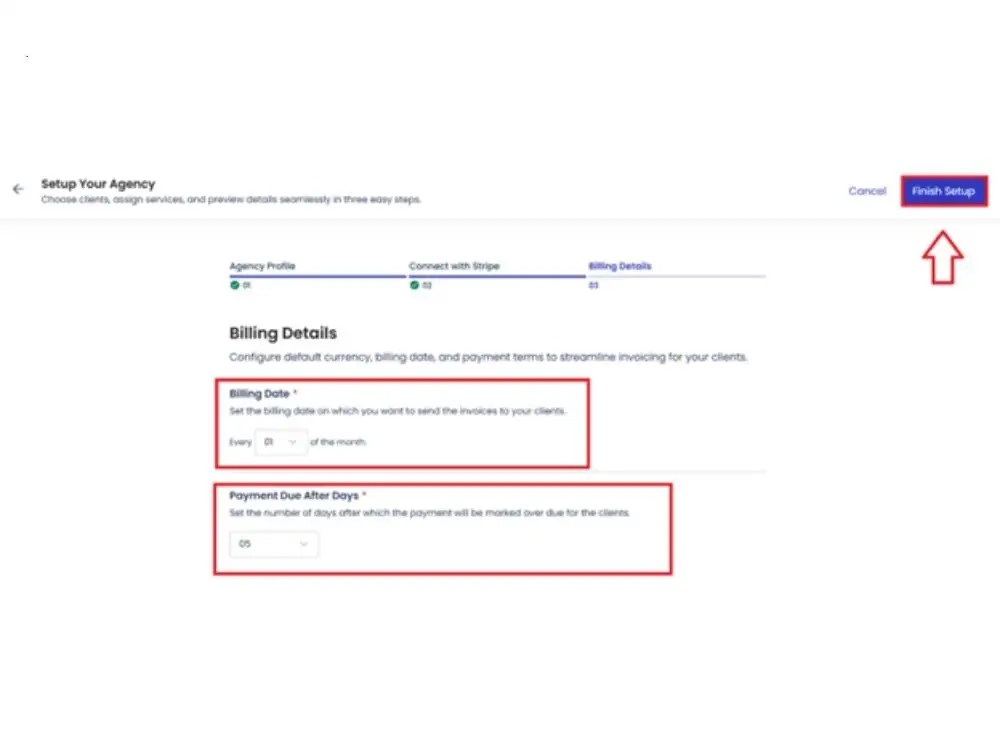
- And that’s your account sorted.
Step#3: Time to Add Your Clients
- Now go to the Clients tab. Add their contact info, upload their logo (if you’ve got it), and pick how often they’ll be billed.
Once that’s in, head over to Services. You can plug in things like:
- One-time deliverables
- Ongoing monthly work
- Projects broken into phases
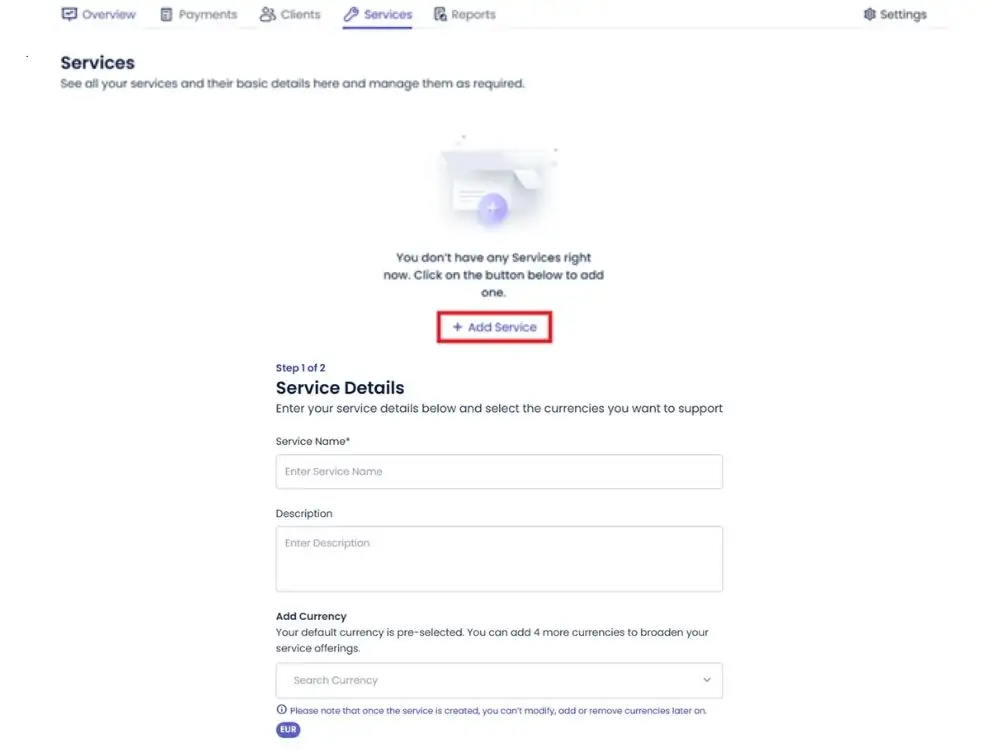
- Choose how you want to bill them (flat rate, recurring, milestone-based, etc.), set the amount, and save.
- You can also set taxes or discounts if that’s part of your deal with them.
Step#4: Let the Invoices Handle Themselves
This part is where it gets easier. Instead of generating a new invoice every time, you can schedule them to go out automatically, such as monthly, quarterly, or whatever works.
Tweak the design, double-check the content, and hit send when ready. You can also turn on reminders so you don’t have to remember who paid what and when. If a client pays through bank transfer or prefers offline methods, just mark it manually.
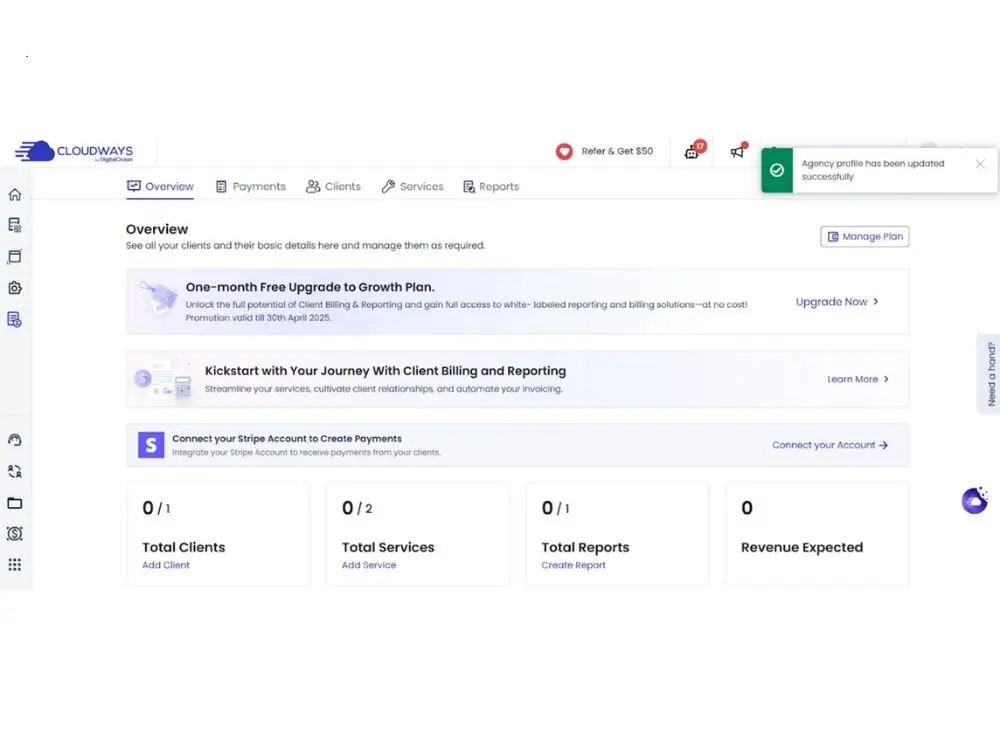
Step#5: Track It Without Digging
Every invoice, payment status, refund, and client note are visible from the dashboard. You don’t have to click through a maze to see what’s going on.
- If something’s late, you’ll see it. If a refund needs to go out, it’s right there too.
- It’s the kind of setup that just works without requiring more apps or more hours.
- Picking the Right Client Billing Tool That Fits.
- Hourly, flat fee & Recurring. It’s based on how you operate your shop.
Freelancers doing one-off jobs often stick with hourly rates or fixed fees. Agencies handling retainer work lean toward monthly setups. Some businesses mix and match, and there’s nothing wrong with that, especially if you’re using tools that make it easy to manage, like the best sanctions screening software for compliance-driven workflows.
Cloudways lets you do all of it from one place, so you don’t have to adjust your process to fit the tool.
Common Mistakes to Avoid
Some things come up again and again. Here are three you’ll want to steer clear of:
- Sending bills late: That’s the fastest way to slow your income down. Set a schedule and let the system handle the rest.
- Leaving out payment terms: Always show what’s due and when. That cuts down on the back-and-forth.
- No follow-up: Even good clients miss invoices sometimes. Auto-reminders help you skip awkward emails and keep things moving.
Wrapping Up
Billing shouldn’t feel like another full-time job. After establishing the fundamentals, it should run smoothly in the background. If you’re on Cloudways, you’ve already got the tools. You just need to switch it on. There’s no extra cost to test it out, and getting started takes five minutes or less. No fluff. No friction. Just one less thing to think about.
FAQs
Q1: What if my client wants to change their billing method halfway through a project?
Simply update their profile in your system and communicate the change clearly. This will ensure both parties understand the new terms.
Q2: How can I prevent chargebacks from happening?
To prevent chargebacks, use clear contracts, maintain detailed work records, communicate regularly about deliverables, ensure your business name appears clearly on credit card statements, and consider requiring signed approval before processing payments.
Q3: How long should I give clients to pay their invoices?
Net-30 terms (30 days) are standard for most industries, but you can adjust based on your cash flow needs and client relationships.
Explore Related Posts
https://smarttoolsai.com/post/high-risk-merchant-account-at-highriskpay-com
https://smarttoolsai.com/post/offshore-merchant-processing-for-high-risk-businesses