How to Start a Shopify Store: Step-by-Step Guide for Beginners
.webp)
Thinking about starting a Shopify store? I see why. It keeps popping up everywhere as the go-to platform for selling online. And honestly, it's popular for a reason.
Shopify handles the technical stuff that used to require a web developer. You can set up a functioning store in an afternoon instead of waiting weeks. But that doesn't mean it's obvious once you actually log in.
The dashboard has so many options. You may get questions like should I customize the design right away? Add products first? What about payment settings?
This guide will show you exactly how to build your Shopify store from nothing. I'll explain what actually matters and what you can ignore for now. By the end, you'll have a real store that's ready to take orders.
Key Takeaways
- A complete step-by-step guide to set up your Shopify store from scratch.
- Know how to add products, payments, and shipping the right way.
- Learn free marketing strategies that bring real customers.
- Understand realistic timelines for your first sale and growth.
- Avoid common mistakes that make new store owners quit early.
Step 1: Sign Up and Choose Your Plan
A) Creating Your Shopify Account
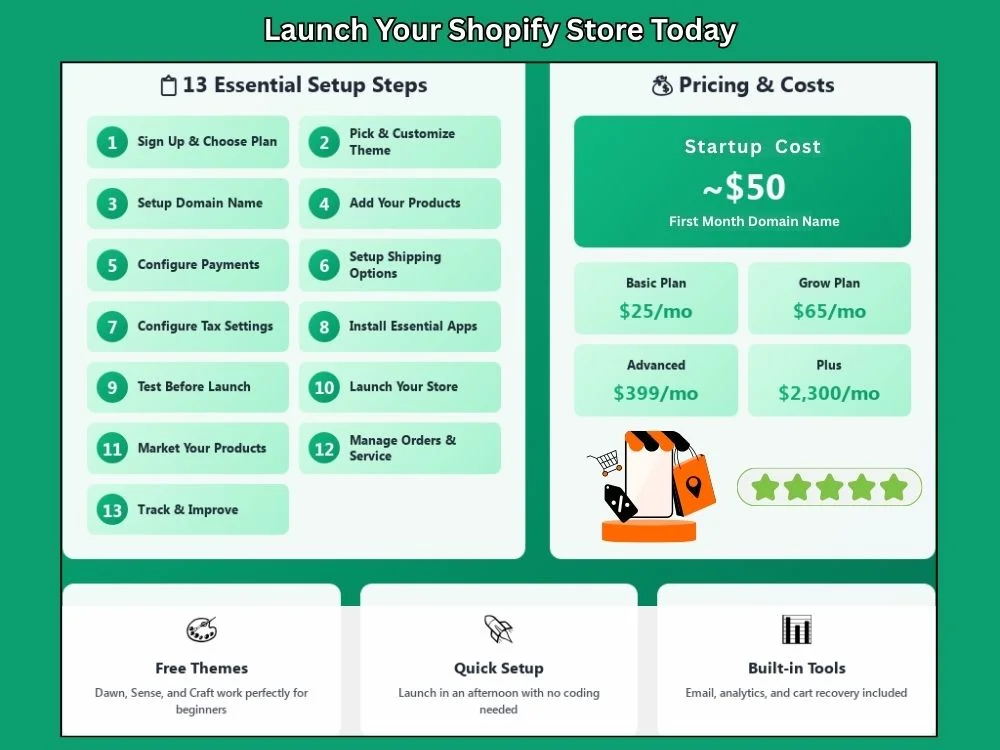
Visit Shopify.com and sign up for the free trial. They offer a 3-day free trial, which you can use without entering your credit card information. The first 3 months of your selected plan will cost you $1 per month.
You’ll need:
- An email address
- A store name
- Basic business details
Don't stress about your store name yet. You can easily change it later. Your store name also creates your temporary web address like yourstore.myshopify.com. But you have the option to add a custom domain at any time.
During signup, Shopify asks simple questions like what you plan to sell. Just answer quickly or skip them. They don't affect how your store works.
B) Understanding Shopify Pricing Plans
Here's what the main plans offer:
| Plan | Best For | Monthly (Pay Monthly) | Monthly (Pay Yearly) | 3rd-Party Payment Fees |
|---|---|---|---|---|
| Basic | Beginners | $25 | $19 | 2% |
| Grow | Growing stores | $65 | $49 | 1% |
| Advanced | Scaling brands | $399 | $299 | 0.6% |
| Plus | Enterprise | $2,300 | $2,300 | Custom rates |
Start with the Basic plan. You can upgrade once sales pick up. Paying yearly saves you money because it comes with 25% discount. But stick with monthly when you're just testing things out.
C) Shopify Payments vs Third-Party Processors
Shopify Payments makes things simpler:
- No extra transaction fees
- Faster setup
- Accepts cards, Apple Pay, Google Pay, and Shop Pay
You can use PayPal or Stripe instead, but Shopify charges the extra fees shown in the table above (2% on Basic, 1% on Grow, 0.6% on Advanced). These fees are on top of what PayPal or Stripe already charges.
Shopify Payments isn't available everywhere. So check if your country supports it during setup. If not, you'll need a third-party option anyway.
Step 2: Choose and Customize Your Shopify Theme
A) Browsing the Shopify Theme Store
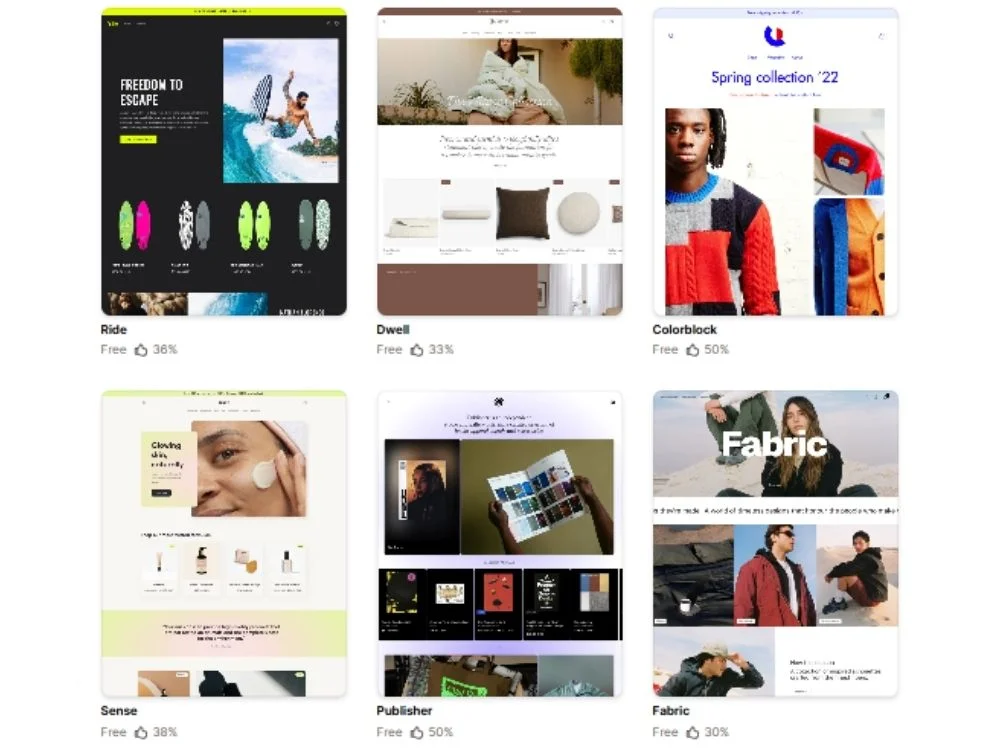
The look of your store depends on the Shopify theme you choose. There are free theme options that work perfectly fine for beginners.
Best free Shopify themes:
- Dawn: Fast, clean, and modern.
- Sense: A minimalist and product-focused theme.
- Craft: Great for handmade or artisan brands.
Paid themes are between $100–$500 that offer more layout options. But save your money for now. Free themes handle everything you need when starting out.
B) Installing Your Theme
Go to: Online Store > Themes
Then:
- Scroll to the Theme library section.
- Click Add theme.
- Choose Visit Theme Store or browse free themes.
- Preview different options.
- Click Add to install the one you like.
You can test multiple themes by installing. But only one goes live at a time. Always preview before publishing.
C) Customizing Your Theme Without Coding
Click Customize next to your theme to open the editor.
Focus on:
- Header: Upload your logo (PNG with transparent background works best) and set up navigation.
- Homepage: Add banners, featured products, and collections.
- Colors and fonts: Keep them readable and matching your brand. To get color codes, check our RGB to Hex tool.
- Footer: Include contact info, policy links, and social media.
The editor shows changes in real-time. Play around with it. You can always undo changes before saving. Always check the mobile preview. Most shoppers browse on phones, so your store needs to look good on small screens. Keep things clean and simple.
D) Essential Pages to Create
Go to Online Store > Pages and click Add page.
Must-have pages:
- About Us
- Contact
- Shipping & Returns
- FAQ (if helpful)
For legal pages, go to Settings > Policies. Shopify generates templates for:
- Privacy Policy
- Refund Policy
- Terms of Service
- Shipping Policy
Edit these templates to match your business, then link them in your footer. These pages are vital to build customer relationships and protect you legally.
Step 3: Set Up Your Domain Name

A) Choosing Your Domain Name
Keep it:
- Short
- Easy to spell
- Brand-related
Avoid random numbers and hyphens. They're hard to remember and look unprofessional. Stick with .com if possible because it's what people trust most. You want consistent branding everywhere.
B) Buying a Domain Through Shopify
Go to Settings > Select Domains, then click Buy new domain.
Domains usually cost $10–$20 per year. Shopify handles setup automatically. It’s slightly expensive but very convenient. You can also find domains cheaper elsewhere like GoDaddy or Namecheap. But you'll need to connect them manually.
C) Connecting an Existing Domain
Already own a domain? Connect it via Settings > Domains > Connect existing domain. You'll need to update your DNS records:
- A record
- CNAME record
Shopify offers step-by-step instructions based on where you bought your domain. Changes may take 24-48 hours to be fully processed.
D) Free myshopify.com Domain
Shopify gives you a free subdomain, but it looks unprofessional. Get a custom domain before launching seriously. Use our domain name search tool for convenience.
Step 4: Add Your Products
A) Creating Your First Product
Go to Products > Add product.
Fill in:
- Title with clear keywords. Think about what customers search for.
- Description focused on benefits. Include how this product helps them.
- Bullet points that break out key features for easy scanning.
- Your selling price.
- Compare-at price that shows a strikethrough discount (only use for real sales).
- Cost per item for profit tracking.
Write for humans without just targeting search engines. Nobody buys from boring, keyword-stuffed descriptions.
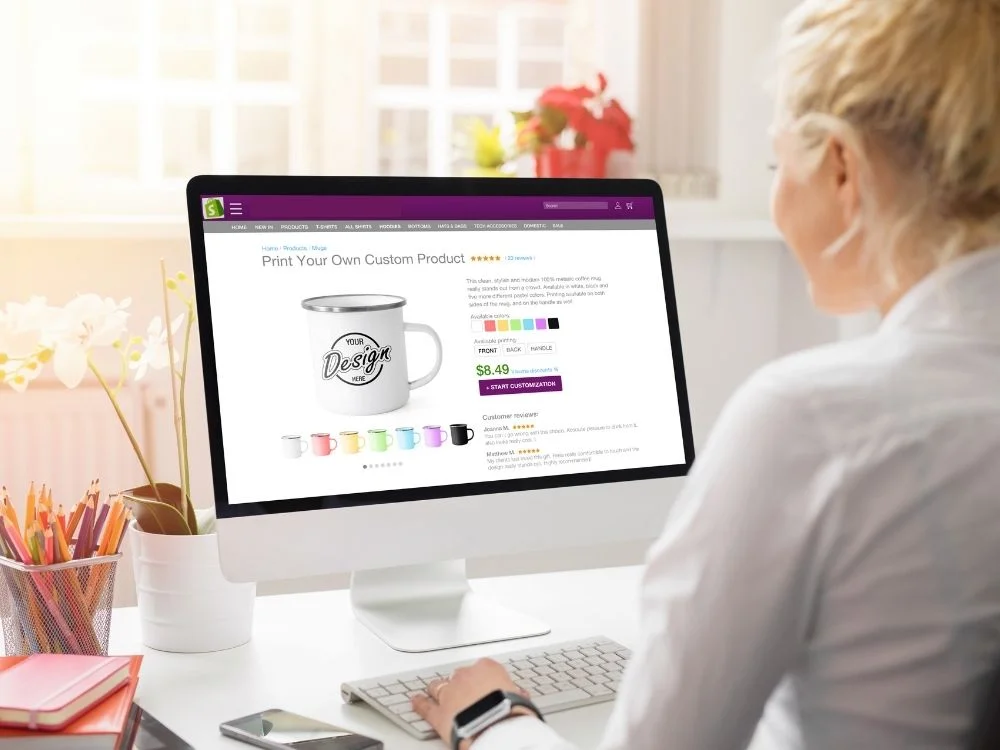
B) Product Images
Images sell products more than anything else.
Best practices:
- A minimum of 2048 x 2048 px or 2048 x 1365 px for rectangular products.
- Clean backgrounds (white works best).
- Multiple angles so customers see details.
- Lifestyle shots showing the product in use.
- First image becomes your thumbnail everywhere.
Upload either JPG or PNG files. Utilize Shopify's built-in compression to compress images that keep your store fast. You can also use our image tools to perform any type of conversion and compression needs in one place.
C) Inventory and Variants
Turn on Track quantity if you need inventory management.
Add variants for things like:
- Size
- Color
- Material
- Style
Each variant can have its own price, SKU, stock level, and image. Click on a variant to assign a specific product photo to it.
If you sell physical products with barcodes, add them in the barcode field. Helps with inventory tracking later.
D) Product Organization
Keep your store organized using:
- Collections: Group related products (For example "Best Sellers").
- Tags: Add keywords for filtering ("vegan," "sale," "new").
- Product type: Category for backend sorting ("T-Shirts").
- Vendor: Brand or supplier name.
Set up automated collections based on tags or conditions. Saves you from manually adding products every time. Need to add similar products? Use the Duplicate button to copy an existing product and edit the details.
E) SEO for Product Pages
Scroll down and click Edit in the Search engine listing section:
- Page title under 60 characters. Include your main keyword naturally.
- Meta description around 155 characters. Make it compelling.
- Clean URL handles (/blue-cotton-t-shirt).
- Alt text for images.
To quickly find words and characters of SEO elements, use our word counter tool that will instantly show you every detail.
Step 5: Set Up Payment Methods
A) Activating Shopify Payments
Go to Settings > Payments.
First, you must check whether Shopify Payments is available in your country or not. If available, this is your best option.
You'll need to provide:
- Business information
- Bank account details for payouts
- Tax identification number
Shopify Payments accepts:
- Credit and debit cards
- Apple Pay
- Google Pay
- Shop Pay
No extra transaction fees. Your payouts typically arrive in 2-5 business days. The first payout might be held for a few days while Shopify verifies your account.
B) Alternative Payment Gateways
You can opt for them when Shopify payment isn't available, or you just need additional options. These include:
- PayPal
- Stripe
- Regional processors (varies by country)
Remember, using third-party processors adds extra fees on top of your plan's credit card rates (2% on Basic, 1% on Grow, 0.6% on Advanced). You can enable multiple payment methods. More options usually mean more completed sales.
C) Manual Payment Methods
You can also offer:
- Cash on Delivery (COD)
- Bank transfers
- Money orders
These options are relevant for local customers or high-ticket items. Plus, you'll need to manually mark these orders as paid in your admin after receiving the payment.
D) Currency Settings
Set your store's primary currency under Settings > General.
Want to sell in multiple currencies? You'll need Shopify Payments to be active. Then go to Settings > Markets to enable local currencies for different regions. Showing prices in a customer's local currency helps you increase sales.
E) Test Your Payment Setup
Before going live, test your checkout to make sure payments process works correctly. This lets you run fake transactions without charging real money. Run a complete test purchase. Check step 9 that discusses this deeply.
Step 6: Configure Shipping Settings
A) Understanding Shopify Shipping
Shopify shipping is based on zones and rates. You pick which countries or regions you ship to. Then set prices based on things like location, the order weight, and value. Our weight converter tool is handy for you to find different weight measurements of products.
B) Setting Up Shipping Zones
Go to Settings > Shipping and delivery.
Create shipping zones like:
- Domestic (your country)
- International (specific countries or regions)
- Local delivery (if you deliver nearby)
Each zone gets its own rates. Customers see shipping options based on where they're located.
C) Creating Shipping Rates
Options include:
- Flat rate for all orders.
- Free shipping. No charge, great for conversions.
- Weight-based. Charges based on order weight.
- Price-based. Free or discounted shipping above a threshold (Ex, free over $50).
- Carrier-calculated rates. Real-time rates from carriers like UPS or USPS (requires higher plans and Shopify Shipping).
You can offer multiple rate options per zone. Customers choose at checkout.
D) Shipping Strategy Tips
Free shipping increases conversions significantly. However, if you can't offer it on everything, set a minimum order value like "Free shipping over $50".
Be clear about delivery times. Set realistic expectations like 3-5 business days for domestic and 7-14 days for international.
International shipping takes patience. Customs and duties aren't always predictable. Mention this in your shipping policy.
E) Packaging and Fulfillment
If you're in the US, Canada, UK, or Australia, you can buy and print shipping labels right from your Shopify dashboard. It's cheaper than regular carrier rates and saves you from heading to the post office.
Using dropshipping or print-on-demand? Your supplier handles fulfillment automatically. You just forward orders to them. Shopify sends tracking information to customers automatically once you fulfill orders.
F) Local Pickup and Delivery
Offering local pickup? Enable it under Settings > Shipping and delivery > Local pickup.
You can also set up local delivery with custom rates for nearby areas. Good option if you're serving a specific city or region.
G) Shipping Protection
Shipping valuable items? Consider offering insurance or shipping protection. Some stores build this cost into their pricing. Others use apps that let customers add protection at checkout for a small fee.
Step 7: Set Up Taxes
Here's what you need to know about taxes:
| Step | What to Do |
|---|---|
| Know Your Tax Rules | • Every country and state has different tax laws. • You need to collect and pay taxes where required. • Some business structures can create phantom tax issues (you owe taxes on profit you haven't taken out yet). • Talk to an accountant if you're unsure. |
| Turn On Auto Tax | • Go to Settings > Taxes and duties • Switch on automatic tax collection. • Shopify figures out the right tax based on where your customer lives. |
| Adjust Manual Tax Rates (If Needed) | • Auto tax works for most stores. • Digital products sometimes need custom settings. • You can change rates manually for specific places. |
| Get Your Tax Reports | • Find them under Analytics > Reports > Finances • Download the data when it's time to file. • Keep copies for your records. |
Shopify makes tax calculation easier. Anyhow, you're still responsible for filing and paying on time. Get professional help when in doubt.
Step 8: Install Essential Shopify Apps
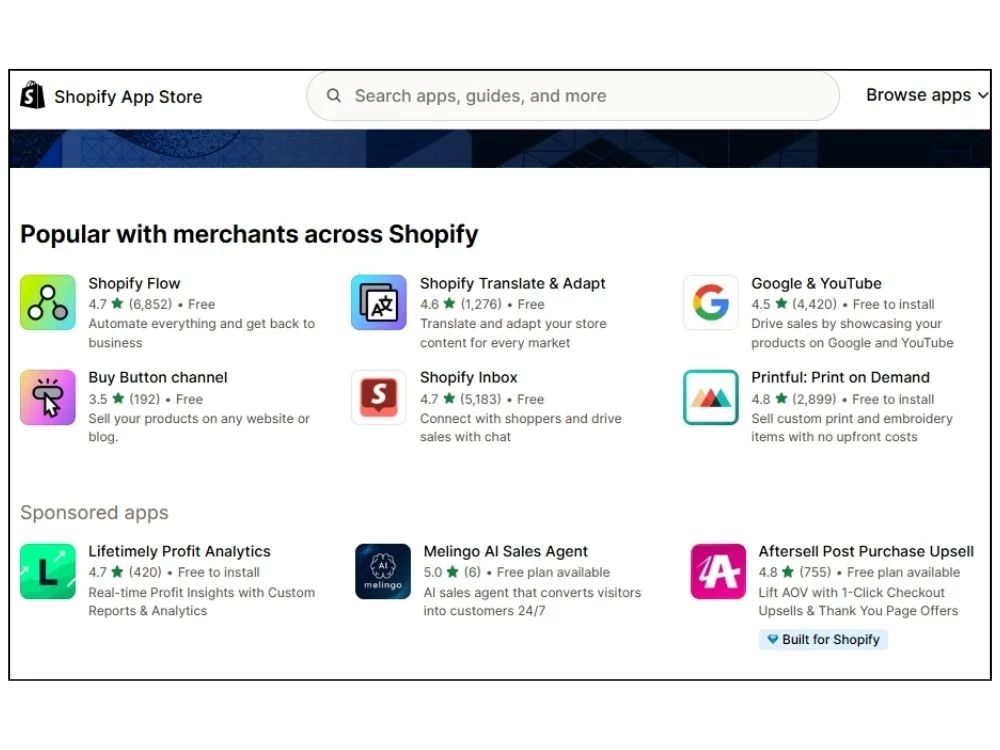
A) Navigating the Shopify App Store
Go to apps.shopify.com or click Apps in your dashboard. Here's the thing about apps. They look appealing. You'll want to install everything. Don't do that.
Every app you add can slow your store down. Start small. Add more only when necessary. Check reviews and pricing before installing anything. App subscriptions sneak up on you.
B) Use What Shopify Already Offers
Before spending money on apps, use what's already included:
- Shopify Email that sends marketing emails for free up to 10,000 per month.
- Abandoned cart recovery automatically emails people who left items in their cart.
- Basic analytics shows traffic and sales data.
These work fine when you're starting out. No need to upgrade yet.
C) Apps You Might Actually Need Later
Email Marketing (when you outgrow Shopify Email).
- Klaviyo - Free up to 250 contacts, then around $20/month.
- Omnisend - Has a free starter plan.
Product Reviews
- Judge.me - Free plan works well.
- Loox - Paid, but great if you want photo reviews.
SEO
- Plug in SEO - Free scan tells you what's broken.
- SEO Manager - Paid option with more features.
Upsells
- Frequently Bought Together - Shows "customers also bought" suggestions.
- Shopify has basic product recommendations built-in for free.
Fulfillment
- DSers - Free, connects AliExpress for dropshipping.
- Printful - Free, handles print-on-demand.
Customer Support
- Tidio - Free plan for live chat.
- Gorgias - Paid, impact unless you're getting lots of orders.
Analytics
- Google Analytics - Free, connects through your settings.
- Lucky Orange - Paid, shows heatmaps and visitor recordings.
D) Don't Go Crazy With Apps
Install maybe 2 or 3 apps maximum when starting. Most apps charge $10 to $50 per month. Get three of those and you're paying more for apps than your actual Shopify plan.
Test each app for a week. If you're not really using it, delete it. Unused apps still slow your site down.
Step 9: Test Your Store Before Launch
A) Run a Test Order
Go to Settings > Payments and turn on the test mode.
Add a product to your cart and go through the entire checkout like a real customer would. Pay with a test credit card (use our credit card generator for test numbers).
Check that you receive:
- Order confirmation email
- Order shows up in your admin dashboard
Ensure the emails look professional and navigate to the right address.
B) Test Checkout Experience
Try checking out on:
- Your phone (this is how most people shop).
- Desktop computer.
- Different browsers (Chrome, Safari, Firefox).
Test both logged-in checkout and guest checkout. Some customers don't want to create an account. Apply a discount code to make sure it works. Nothing's worse than launching a sale and the codes don't apply.
C) Check Everything Else
Click around your store like you're a customer:
- Does your logo show up correctly?
- Do all the menu links work?
- Does the search function find products?
- Are your legal pages linked in the footer?
- Do social media icons go to the right profiles?
- Does the contact form actually send you messages?
Load your store on your phone and see how fast it loads. If it takes forever, compress your images more.
D) Pre-Launch Checklist
Go through this before removing the password:
- All products added with images and descriptions
- Shipping zones and rates configured
- Payment methods working
- Taxes turned on
- About, Contact, and policy pages created
- Store tested on mobile
- Test order completed successfully
- Email notifications working
- Logo and branding look right
E) Go Live
When everything checks out, go to Online Store > Preferences. Scroll down and disable password protection. Your store is now live. Anyone can visit and buy from you.
Step 10: Launch Your Shopify Store
A) Soft Launch vs Grand Launch
Don't announce your store everywhere on day one. Start soft. First, share with some friends or family. Let them click around and actually try to buy something.
This helps you figure out things that don't work the way you thought it would. Fix that weird stuff before you tell everyone on the internet.
B) Announcing Your Launch
Go public once you've fixed the obvious problems.
Post on:
- Social media, wherever your audience hangs out.
- Your email list if you have one.
- Personal network and groups you're part of.
Ask people for honest feedback. You'll learn things you never noticed.
C) Launch Day Checklist
Stay near your phone the first few days:
- Keep checking for orders.
- Reply to messages quickly.
- Fix anything that breaks.
- Answer questions people have.
- Actually celebrate when you get your first sale.
Those first couple of days teach you more than any guide can.
D) Getting Your First Sales
Mostly, you'll get your first sales from people who know you. That's totally normal. Reach out to friends and family. Offer them a discount, and they are happy to support someone they know.
Other things that help:
- Launch a discount like 15% off this week only.
- Free shipping for early buyers.
- Create some urgency with limited-time deals.
- Just straight up ask your network to check it out.
Once a few people buy, ask them to leave reviews. New customers trust other customers way more than they trust you. That first sale feels incredible. Then you figure out how to get another one. And another. That's how this works.
Step 11: Marketing Your Shopify Store
A) Organic Social Media
Social media is a great starting point where many people hang around and you can market your store for free. Let the world know about your new shop.
Post regularly on:
- Instagram if you sell visual products.
- TikTok for a younger audience.
- Facebook for older demographics.
- Pinterest for home, fashion, food, craft, or similar items.
Show your products being used by real people. This helps because nobody cares about stock photos on white backgrounds anymore.
B) Content Marketing
Start a blog on your Shopify store. Write stuff relevant to you that actually helps people. If you sell coffee makers, write about "how to make cold brew at home".
Answer questions people are already searching for. SEO takes a long time. Like 6 to 12 months before you see real traffic. But it's free traffic and who doesn’t want it?
C) Email Marketing
Start collecting emails from day one. Put a pop-up or footer signup on your site.
Send:
- Welcome email when someone subscribes.
- Abandoned cart reminders. Shopify does this automatically.
- Weekly or monthly updates with new products or tips.
- Email makes you money. People who give you their email actually want to hear from you.
D) Influencer Marketing
Find small influencers with 1,000 to 50,000 followers in your niche. Send them free products. Ask if they'd post about it. Offer them a commission on sales through their link. Micro-influencers are cheaper and their audiences actually trust them.
E) Paid Advertising
Don't spend too much on ads right from the start. Learn what works organically first. Figure out which posts get engagement. Test your messaging for free before paying to amplify it. When you do start ads, spend $5 to $10 per day max. Learn as you go.
F) SEO for Shopify
Go back to those product pages and blog posts. Make sure:
- Page titles include keywords people search.
- Images load fast (compress them).
- Your site works perfectly on mobile (do a mobile-friendly test using our tool).
Submit your sitemap to Google Search Console (GSC is free). This helps Google find and index your pages. SEO is slow. Really slow. But it brings customers who are already looking for what you sell. That's the best kind of traffic.
Step 12: Managing Orders and Customer Service
A) Processing Orders
Orders show up in your dashboard under Orders. Click on the order and mark it as fulfilled once you ship it. If you're using Shopify Shipping, print the label right there.
Add the tracking number so customers can follow their package easily. Ship fast since people expect their stuff quickly, even if you're a small store.
B) Handling Customer Inquiries
Reply to messages quickly. Same day if possible.
Most people ask the same things:
- When's my order shipping?
- What's your return policy?
- Do you have this in another size?
Create an FAQ page to answer these upfront. This is vital to save time and helps customers find answers faster. Stay polite even when customers are annoying because that's how businesses respond. How you handle problems matters more than the actual problem.
C) Returns and Refunds
Write a clean return policy and make it easy to find. Put it in your footer so people can find it easily.
When someone wants a return:
- Respond quickly.
- Make the process simple.
- Issue refunds through your Shopify dashboard.
Pay attention to why people return things. If everyone says your shirts run small, update the description. Learn from what goes wrong. This helps minimize returns and return item chargebacks.
D) Building Customer Loyalty
It's way easier to sell to someone who already bought from you than finding new people.
After someone buys:
- Send a thank you email.
- Follow up a week later asking how they like the product.
- Request a review (people actually do this if you just ask).
- Offer repeat customers a discount on their next order.
Happy customers tell their friends. Treat them well and they become your best marketing.
Step 13: Track Your Performance and Improve
A) Shopify Analytics
Go to Analytics in your dashboard.
Check:
- How much you're selling
- Where your traffic comes from
- Which products people actually buy
- How many visitors turn into customers
This tells you what's working and what isn't.
B) Google Analytics Integration
Connect Google Analytics for free through Settings > Apps and sales channels.
It shows you stuff Shopify doesn't:
- How long people stay on your site
- Which pages they leave from
- What they do before buying
Takes 10 minutes to set up. It worths a lot.
C) A/B Testing
Change one thing at a time. Maybe your product photo. Maybe your headline. Maybe your price. Wait a week or two. See if it helps or hurts sales. Don't change everything at once or you won't know what actually made a difference.
D) Continuous Improvement
Your store on day one won't be your store six months from now. That's normal.
Keep improving:
- Read customer feedback and complaints.
- See what other stores in your niche are doing.
- Fix things that confuse people.
- Add features when they make sense.
Common Mistakes to Avoid
Most newbie owners make the same mistakes. Avoid those before they impact:
- Bad photos: Bad product images can severely impact your sales and reputation. People wanna see what they're buying clearly.
- Too many checkout steps: Avoid navigating people to a complicated checkout experience. Keep it simple.
- Hidden shipping costs: This could make people abandon their cart at checkout. Show shipping costs early or offer free shipping.
- Bad mobile experience: Most people shop on their phones. If your store looks terrible on mobile, fix it.
- Confusing policies: Make your return and shipping info easy to find. Hidden policies make people nervous.
- Expecting quick money: You're not making thousands in week one (a few exceptions). Accept and put effort into growing slowly.
Wrapping Up
Starting a Shopify store gives you a real chance to sell online. It's not complicated when you follow this guide step by step. Shopify has great features you need to grow your business and make your first sale. Set things up properly and avoid common mistakes. Keep working and be patient. That's how you build a successful online store.
FAQs
Q1: How much does it cost to start a Shopify store?
Around $50 to start. That's your first month after the trial, a domain name, and maybe an app or two. You can go cheaper by skipping apps early and using the free myshopify.com domain at first.
Q2: How long until I make my first sale?
Could be days, could be weeks. Friends and family usually buy first. Real customers take longer. Don't just wait. Post on social media and tell people about your store. Sales don't happen by themselves.
Q3: Do I need experience to run a Shopify store?
Nope. You learn by doing. Most successful store owners started knowing nothing. Mistakes are common. Fix them and keep going. That's how everyone figures this out.
Explore Related Posts
https://smarttoolsai.com/post/how-to-start-a-saas-business
https://smarttoolsai.com/post/supply-chain-management
https://smarttoolsai.com/post/offshore-merchant-processing-for-high-risk-businesses